1. Name and save project in text file.
2. Load 4 photos: top, front, right, rear.
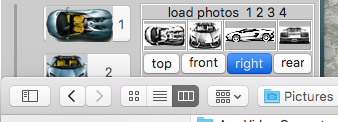
3. Set base point 0 (red) in each of 4 photos.
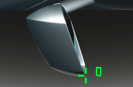
4. Set points 1-7 (red) - each must be at least in 3 of 4 photos - 123,
124 or 134
(in each photo must be >5 points)
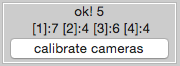
5. Click calibrate cameras - if calibration not ok! (is >50) try checking & adjusting points or adding
points
8-13 (red).
6. If your model is symmetrical, set symmetry line with 498, 499 (red) points in 124
photos.
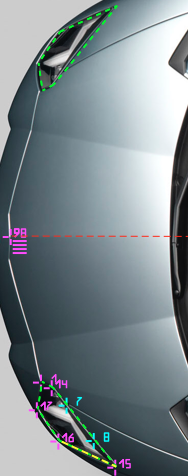
7. Set points 14 (red), 15, 16... (each must be at least in 2 of 4 photos).
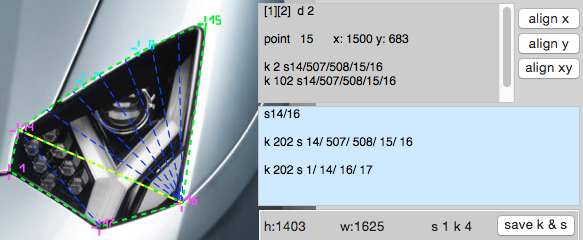
8. Set edges of parts by typing text in the blue pad:
k2s3/7/15 - triangle of points 3, 7, 15 cut from 2 photo (points must be typed in clockwise direction).
k102s3/7/15 - symmetrycal part.
k202s3/7/15 - both original & symmetrycal parts.
k-2s3/7/15 - original part cut from symmetrical side of photo.
k2s3/501/502/7/15 - part with cubic spline (control point 1 = 501 control point 2 = 502) 502 = point 2 (blue),
607 = point 107 (blue).
s4/6 - merging two parts, containing points 4 and 6, in one.
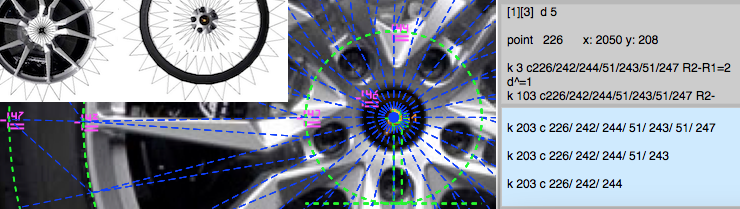
k2c1/2/3 - circle with centre in point 1, radius #1 in point 2, radius #2 in point 3 cut from
2 photo
k2c1/2/3/4/5 - ring sequential to circle with centre in point 4, radius #1 in point 5 (point 4
can be
in one picture)
k2c1/2/3/4/5/6/7 - ring sequential to ring sequential to circle with centre in point 6, radius #1 in point 7 (point 6
can be in one picture)
etc
9. After typing, click save k & s.
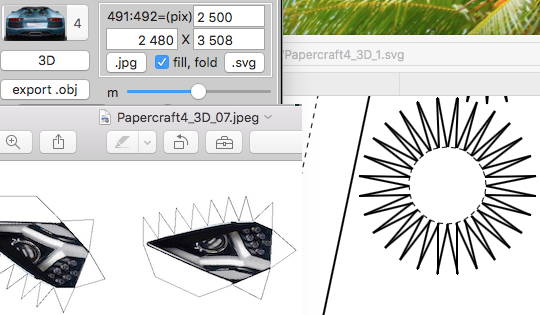
10. Click .jpg or .svg to save for printing model parts or click
.obj to save .mtl and .obj files (textures for model same as source 4 photos). Click .igs to save in IGES format (NURBS surfaces) for
use
in CAD/CAM CNC and 3D printer.
One part can include max. 100 points (21 for circle).
One model can include max. 500 parts.
If you see [x][x] or [x][x][x] in point info pad you can try auto align x or y position of point (in some cases it may be helpful).
Size of photos can be from 100x100 to 7000x7000, but scale of photos 2, 3,
4 to photo 1 must be (x0.1 .. x1.9).
Exported .jpeg files is 2480 x 3508 pixels (max 9933 x 14043). If you have set 491
and 492 points you can change size of model (2500 can be from 1000 to 5000).